Using paint, you can not only give the walls a color, but also create many interesting patterns and ornaments.
The author offers an idea how to make a realistic 3D drawing. This is a very quick and easy project that even beginners can handle.
The first thing we need is to paint the wall in a dark gray color. Do not worry about gloom, almost all of it will be blocked by light shades.
Now, using a thin masking tape, divide the wall into identical squares. Do not make them too large, otherwise the effect of volume will be less pronounced.
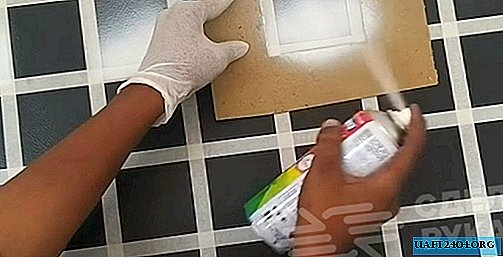
Now you need to cut the frame out of thick cardboard, leaving a window in it that is slightly larger than the square on the wall.
Make the edges of the frame at least 10 cm so that the aerosol from the spray can not get to neighboring cells. The cardboard needs to be selected very dense, then the paint does not soak it through.
The main stages of work
In a checkerboard pattern, paint the bottom of the squares white. Do not hold the spray gun perpendicular to the wall, but spray with a jet directed from below.
So you create a smooth and neat transition. It is better if the gray paint, which serves as the bottom layer, has a small grain structure. Under light spraying, it will appear.
Then, in the same way, tint the bottom of the cells with bronze paint. Pre-white paint should dry completely.

Try not to make the layer too thick to avoid smudges. It remains only to be patient and wait for the paint to dry.
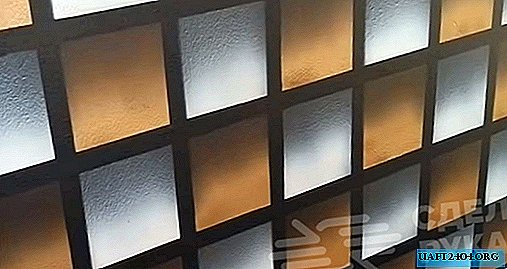
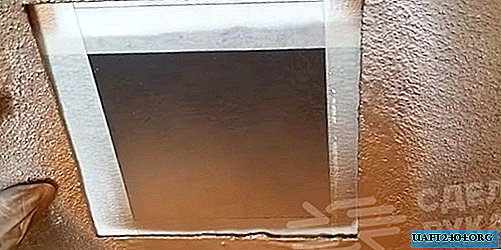
While the tape is still pasted, carefully look at the wall from afar. Maybe you missed something and the site needs to be repainted? Now you can remove the tape and enjoy the result!

The dark gray color on top creates a shadow effect and it seems that there really are recesses in the wall. Such an optical illusion looks most interesting in motion when you pass by.