Share
Pin
Tweet
Send
Share
Send
Sooner or later, an ax made of wood has to be changed, since the metal head of an ax is stronger than a wooden handle, both mechanically and in opposition to external adverse factors.
Removing the old hatchet
To facilitate the removal of the old ax, it is better to cut it almost immediately behind the rear edge of the ax head. In order not to mess with wooden wedges, it is necessary to drill the remainder of the ax with a drill and, thereby, weaken its landing. Now it remains only to knock out a piece of wood, hitting it with a hammer with a hammer on the front side.

It is useful to consider the quality of the nozzle of an old tool for the embossed part. From the remaining trace it can be seen that it was carried out according to all the rules. The fastening of the new wooden part of the ax must be made exactly the same.

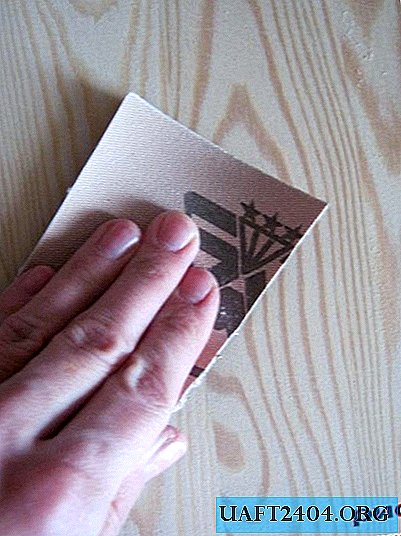
Since due to the moisture contained in the wood element, the head opening may have traces of oxidation, which should be removed by medium-sized sandwiched paper.
Nozzle of the new hatchet
Now you can proceed to the nozzle of a new hatchet with ready-made grooves for expansion wedges. We insert the handle into the inlet at the beginning only with the help of hand force approximately 1/4 of the length of the head.
Then, holding the ax with the canopy with the head below, hit the mallet on its upper end as many times as necessary so that the lower end of the handle leaves the landing hole in the head by about 10-15 mm. Moreover, in the process of packing, it is necessary to ensure that the head of the ax does not skew to one or the other side in the longitudinal and less often in the transverse direction.


Now you need to make sure that the head of the ax has taken its place. To do this, draw a line on the tree along the outlet edge of the horse with a pencil, and again several times vigorously hit the free edge of the handle with a mallet.
If after additional blows the head remains in the same place, then the nozzle can be considered complete. Otherwise, the process must be continued until the heads stop moving along the ax.

The wedge should be made from the same wood species as the handle. In width, it should be equal to the longitudinal size of the hole, have uniform taper and thickness: at the end 3-5 mm, at the base - about 1/3 of the transverse size of the handle.

Before installation, the butt end and groove of the ax, as well as the wedge on all sides, are greased liberally with melted linseed oil until the wood ceases to absorb it.

So that the wedge does not crack and, moreover, doesn’t crack, we hammer it into the groove intended for it with precise blows of a mallet, using as a tip a suitable piece of a wooden bar with even parallel faces. Moreover, the beam during impacts should completely overlap the area of the upper end of the wedge.

As soon as the wedge ceases to enter the groove, we can assume that he took his place. Excessive zeal in this case is not welcome, as it can lead to breakage of the wedge.


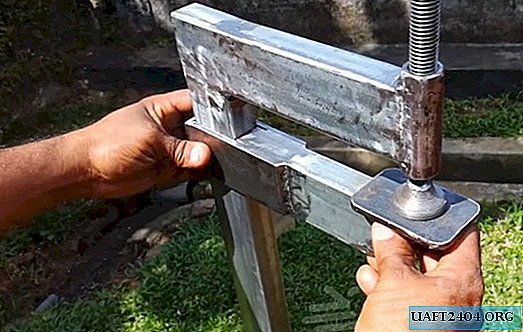
We clamp the handle in a carpenter's vise and cut off the excess of the ax, which protrudes from the outlet of the head of the ax, with a part of the wedge, using a hand saw with small teeth. Moreover, the cut must be made by retreating from the edge of the hole in the head by 5-7 mm. This belt will be heard over time and, along with the wedge, will keep the ax head from sliding off the handle.


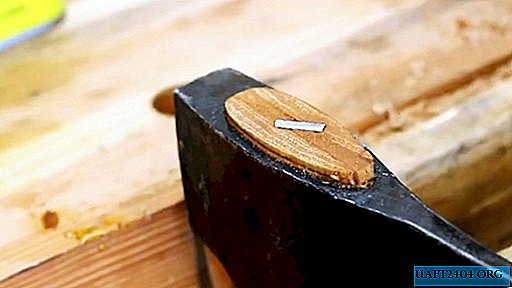
We drive diagonally closer to the center of the output section of the ax of the factory or a home-made metal wedge first with a hammer, and then through a metal tip, so that it is flush with the end of the handle. Surely, the new hatchet will reliably last no less than the previous one.


Share
Pin
Tweet
Send
Share
Send