Share
Pin
Tweet
Send
Share
Send
The disc grinder offered in today's video is fully portable. In addition, if the voltage with a stationary network of 220 V, this tool will be most welcome. After all, it is powered by a 12 V battery.
Brief description of a homemade grinder
The principle of operation is based on the transmission of torque from the engine to the grinding disk. Using such a tool, you can sharpen scissors or a knife, and process a wooden or plastic workpiece.


What do we need for work
Materials:
- DC motor for simulation 775;
- Handle from a drill or perforator;
- 12 V battery;
- Cable sleeve with hidden bolts;
- Button switch;
- Wires with insulated terminals;
- Shrink cambric or electrical tape;
- Bolts, nuts, washers.
- Instruments:
- Cross-head drill or screwdriver;
- Drill for engine shaft diameter;
- Soldering iron;
- Scissors for metal and ordinary;
- Sandpaper, compasses;
- Pliers, knife, pencil;
- Matches or lighter;
- Quick setting or super glue.


We assemble the grinder - a step-by-step master class
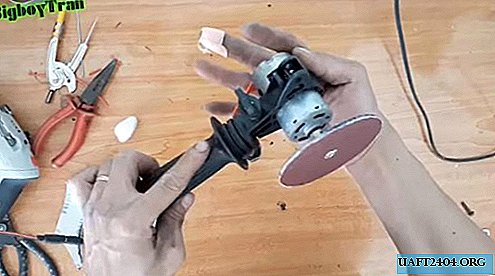
Engine installation
For the basis of our grinder, you need a handle from a drill or perforator with a clamping clamp. In size, it should be suitable for clamping the engine housing.


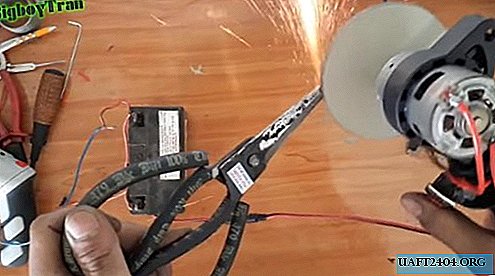
Next, we take the engine to 12V, and we select a cable sleeve under it with a threaded hole at one end, and an open clamp on the other. This element is necessary to clamp the grinding disk, since there is no thread in the motor shaft itself.


We clamp the sleeve on the engine shaft, and fix it securely in the handle clamp.


Electric circuit
In the plastic gate of the handle, we make a hole with a drill with a diameter of 5-6 mm. It is needed for threading wires through the handle.


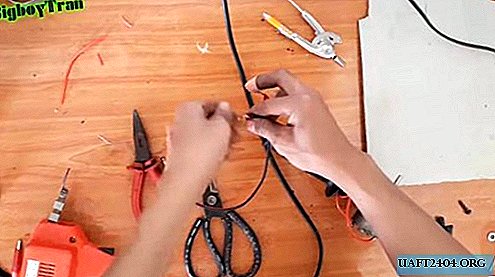
We divide the segment of the paired cable into separate wires, strip the ends and tin them with flux and solder. We try on the button-switch to a convenient place on the handle. We cut one wire, and from two of its parts we make the wiring to the button. All contacts are reliably soldered. We fix the button switch with hot glue.
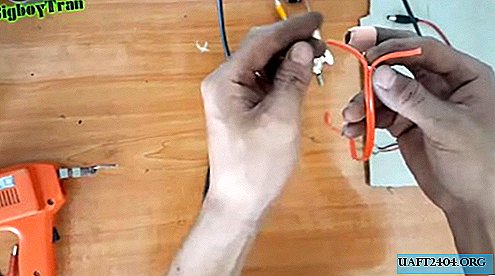


Due to the low voltage, the author of the video preferred to connect the device through the DC jack 2.5x5.5 power connector. These are often used on power supplies for laptops and netbooks. To the contacts removed through the handle, solder the extension cord with the plug from this connector. We isolate the place of twisting with electrical tape or heat-shrink cambrices, burning them with a lighter.


Grinding disc and final assembly of the grinder
We take a sheet of thin but elastic tin, and draw a circle with a diameter of 100 mm with a compass. We cut the disk with scissors, and make a small hole in its center under the clamping screw for the sleeve.


From sandpaper on a fabric basis, cut out a circle previously marked on the disk. In the center we cut out a place under the screw head with scissors.


Glue the sandpaper to the disk on the superglue, cutting the protruding edges.


Clamp the sleeve on the motor shaft with hexagon screws. We fasten the disk to the sleeve with a screwdriver, squeezing it from the back with an adjustable wrench.


The grinder is ready, now you can try to grind or grind something!


Share
Pin
Tweet
Send
Share
Send