Share
Pin
Tweet
Send
Share
Send
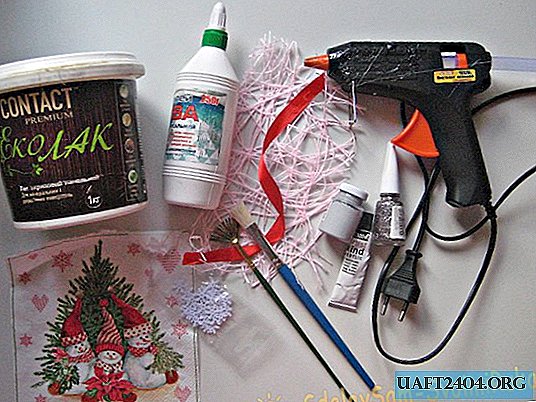
For work, you need materials:
1. A bottle of champagne.
2. Alcohol and cotton pad.
3. White and gray acrylic paints.
4. Wide flat brush.
5. Fan brush.
6. Decoupage napkin.
7. PVA glue.
8. Glue gun.
9. Semolina.
10. Decorative snowflakes.
11. Decorative mesh.
12. Varnish with sparkles.
13. Acrylic varnish.
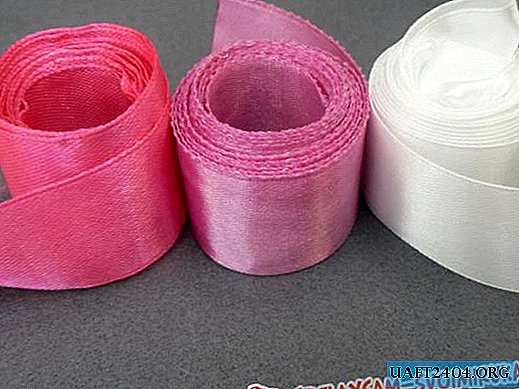
14. Tapes.
Decoupage champagne bottles
1. The first step is to clear the bottle of labels. To do this, lower the bottle into a container of water. After some time, remove the labels from the bottle and allow the glass surface to dry.

2. Then degrease the bottle with alcohol.

3. Getting to the primer of the bottle. To do this, use a wide brush and white acrylic paint. Apply the paint in one coat.

4. Since the surface of the bottle is still visible, it is necessary to apply the next coat of paint.

5. To make the surface of the bottle perfectly snow-white, you can apply a few more layers of paint. Most often, 3 layers of soil will be enough.

6. The soil should dry completely and then you can start decorating the bottle. The main element of the decor will be a decoupage napkin. Using a tear-off method, we extract a drawing from a napkin. Then we remove only the top layer of the napkin on which the drawing is located.

7. Apply PVA glue to the place where the napkin with the pattern will be located.

8. Apply a napkin to the bottle and gently smooth it.

9. Cover the top with glue.

10. Let the drawing dry and do the same job on the back of the bottle.

11. Next, we make an imitation of snow. To do this, in a small container, mix semolina, PVA glue and acrylic paint. It should get a thick mass. Using a cotton swab, apply the semolina mixture at the bottom of the picture.

12. At the top of the bottle (from the neck to the shoulders) we perform ice drops. In this case, we use hot glue.


13. Ice drops must be painted white so that they completely merge with the general background.

14. Next, you need to highlight the drops. To do this, paint a volume of drops with a thin layer of gray paint.


15. We fill the free space between the drawings with the help of decorative snowflakes.
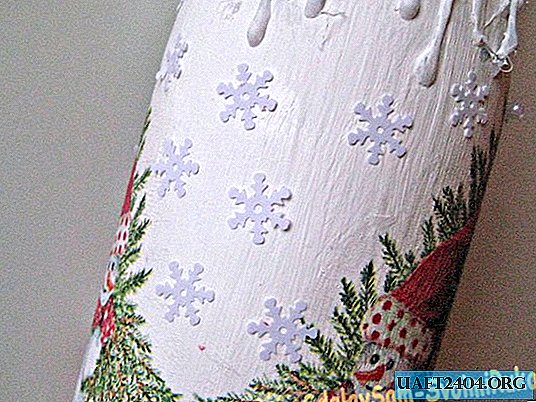
16. Then we paint the snowflakes with shiny varnish. Then we cover the entire bottle with acrylic varnish.

17. Proceed to the decoration of the neck. We take a wide white ribbon and fix it on the neck.

18. On one side of the tape we make one bend and fix it in the center. Thus, we perform 2 more bends. Each bend should be less than the previous one.


19. On the opposite side, we perform a similar work. Cut the tip of the ribbon and glue it in the center of the bow.

20. From a thin red ribbon we make a bow and fasten it in the center of a white bow.

21. Fasten a few curls of red ribbon around the bow. We also decorate the bow with a decorative mesh.

22. A bottle of champagne is ready for the holiday!

The decor of the bottle takes a little time, and the result of the work will certainly bring a lot of positive emotions.


Share
Pin
Tweet
Send
Share
Send