Share
Pin
Tweet
Send
Share
Send
Materials and tools for creating a barbell
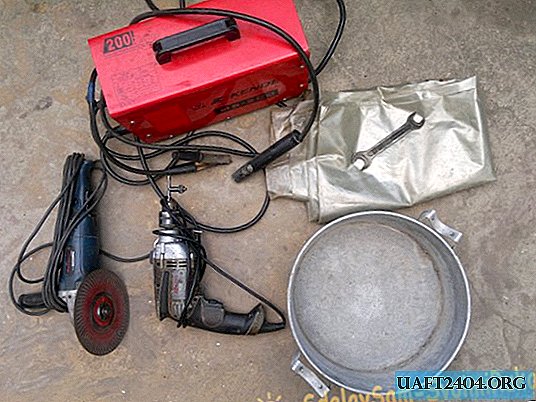
A homemade bar, which is easy to make at home, consists of a metal bar and round concrete blocks that act as pancakes. As a rack for compactness, you can use the bars or concrete a pair of metal pipes or corners. In general, to create a bar you will need the following tools and materials:
- - stainless pipe with a diameter of 25 mm;
- - building materials (cement, crushed stone, sand);
- - several pieces of dense polyethylene;
- - wide pan or similar form for concrete pancakes;
- - paint brush and paint of any color;
- - welding machine, grinder, wrench, hammer drill;
- - a pair of bolts with suitable nuts and washers.
The length of the stainless pipe, which will play the role of the neck, is selected individually, based on the size of the grip, as well as the thickness and weight of future pancakes.
Casting concrete pancakes for the bar
It is recommended to start creating the bar with casting concrete pancakes. To do this, you need a round, wide shape, the role of which the old pan will perfectly perform. The weight of the pancakes is selected individually, and the total weight of the bar can be collected from several pancakes. However, when casting pancakes from concrete, it is not recommended to make them too thin in order to avoid destruction. In this case, two pancakes of 25 kilograms were created, for which a shape with a diameter of 32 cm was used.
In the pan, which acts as a mold, concrete is mixed for the future pancake. For easy removal of the hardened rod pancake, the following condition must be fulfilled: the mold is laid out from the inside with moistened polyethylene, which will ensure a smooth surface of the finished product and will allow easy removal of the hardened concrete from the mold. To obtain the correct proportion of concrete mix, the following is mixed in the form:
- - cement 7 kg;
- - crushed stone of 8 kg;
- - sand 10 kg;
- - water 3.5 l.
Water is added to give the solution optimal density to thoroughly mix the solution. After obtaining a homogeneous mass, a stainless neck tube is vertically inserted into the center of the mold (axis of the circle) vertically and is fixedly fixed. After the mass has hardened, it will be removed, and the hole will be left in the finished pancake, necessary for the heading on the neck. Do not make the mixture too liquid, this is necessary so that the solidification proceeds faster. If you have two identical shapes and tubes, you can fill both pancakes at the same time, otherwise they are cast alternately.

After hardening, concrete pancakes are removed from the mold and weighed. For perfect weight adjustment, excess concrete can be removed by grinding one side with a grinder. To do this, a grinding wheel on concrete is put on the grinder and a small layer of concrete is removed. The castings obtained in this case have a thickness of 25 cm and a diameter of 32 cm. Ultimately, concrete pancakes look as follows:

After the concrete has dried completely, the pancake can be coated with paint. This protects the concrete from moisture absorption, which affects the weight of the bar and can lead to the destruction of pancakes.
Preparation of the neck and bar racks
Based on the thickness of the resulting pancakes and their number, equal indentation is made on both sides of the neck for the pancake nozzle. To fix pancakes on the neck, it is necessary to make protrusions that prevent their arbitrary movement. This is done using a welding machine by welding a thick coarse seam around the circumference of a stainless tube. In this case, the seams were laid at a distance of 40 cm from the edges of the neck, so that later on you could put on additional pancakes to make the shell heavier. The total length of the neck is 2 meters.

After this, the bar stand is prepared. Here, the rear racks of the bars were used, made of metal pipes concreted into the ground. To begin with, the optimal height is measured at which the projectile will be fixed. Then, at the marked points, at one level, the holes for bolts are drilled with a puncher, on which the bar will rest. Durable bolts are inserted into the holes obtained and tightened with nuts for static fixation in the uprights.
The bolts must be of sufficient length so that the bar is securely fixed to them. For safety, it is necessary to screw a couple of nuts with a wide washer onto the ends of the bolts, which will exclude the accidental fall of the rod from the bolts. If this sports equipment is not being built indoors, but on an outdoor sports ground, it is recommended that the bolts and joints be coated with paint, which will prevent corrosion.

After completing all the above points, you can proceed to the assembly of the shell. To do this, the pancakes are put on the bar to the stop on the latches, and the bar is placed on the racks. Here we consider a completely simple and reliable way to make a bar with your own hands, which does not require labor and financial costs. For the bench press, you can install any low bench near the rack. The end result is as follows:

The total weight of this bar is about 55 kg, its weight can be increased by adding concrete or metal pancakes. This projectile is ideal for various exercises and the development of all muscle groups. Carrying out trainings, do not forget about safety, as in any gym, and proceed to exercises in the presence of an insurance partner.
Share
Pin
Tweet
Send
Share
Send

