Share
Pin
Tweet
Send
Share
Send
Materials for work:
1. Framework for a photo;
2. White acrylic primer;
3. One-component craquelure varnish;
4. Acrylic paints (bronze, black, white, blue, emerald);
5. Varnish opaque decorative in a spray;
6. Napkin with floral arrangements;
7. Paper for watercolor;
8. Synthetic flat brush;
9. PVA, ruler, scissors

Work sequence
First of all, we disassemble the framework, leaving only a baguette for work. To prepare it for decoration, we use white acrylic primer.

On a larger frame, the craquelure technique will be worked out. To do this, paint it on the front side with two layers of black and leave to dry.

With a wide synthetic brush we cover the surface of the frame with a single-component craquelure varnish in one layer. We are waiting for drying for about half an hour. We check readiness in an inconspicuous place, the varnish should hardly stick to the little finger.

To achieve a shade of turquoise (French - pale turquoise), mix the blue, emerald and white colors on the palette until a uniform color. The hue should be light enough to contrast with the black base, so add white paint if necessary. The resulting mixture is applied to the frame, leading the brush in one direction. Gradually, the top layer begins to crack, exposing the base. You can speed up this process with a hairdryer. Avoid reapplying paint in the same place. Leave to dry completely.

Getting to the decor of the second frame using the decoupage technique. We duplicate all stages of work. First, cover it with bronze acrylic paint in two layers. Please note that metallic paints are suitable only as a base, it is not recommended to use them over craquelure varnish.

Apply varnish with crackle effect, dry.

We evenly cover the front of the frame with white paint and allow it to dry, observing the appearance of cracks.

From the napkin with floral arrangements, cut out the elements you like, separate the top layer and determine their future position on the frame.

Convert a picture will help a regular file. Put the image face down on the file, and slightly moistened with water, carefully transfer to the selected area of the frame.

So that the image does not move out and holds well, gently coat the top with PVA diluted with water.

After both frames have dried, spray a matte decorative varnish and proceed to the final stage of work - making a mat.

The textured side of the watercolor paper will be front for the mat, so turn the sheet over. As a stencil we use the back of the photo frame with stand. Circle the rectangle with a pencil and cut it out.

We draw two lines diagonally, mark the dimensions of the photograph on the lines with dots. Since the size of the passe-partout should be smaller than the photo itself, then, departing from the points 1 cm inward, draw a rectangle. Cut the diagonals with a clerical knife inside the rectangle and bend the parts of the rectangle outward.

We try on the mat to the photo, and by its size we bend all four parts of the rectangle inward.

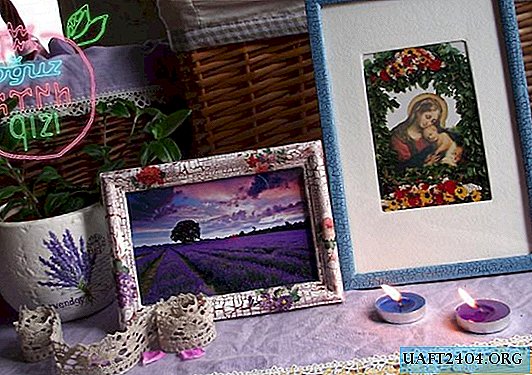
The work is completed. It remains to insert your favorite photos, and the frames in the style of "Provence" are ready!
Share
Pin
Tweet
Send
Share
Send