Share
Pin
Tweet
Send
Share
Send
At first glance, it is not difficult to make such a feather, but the more it will be implied in size, the more laborious the process will become. So we are gaining patience, and the desire to see our further result as soon as possible will help.
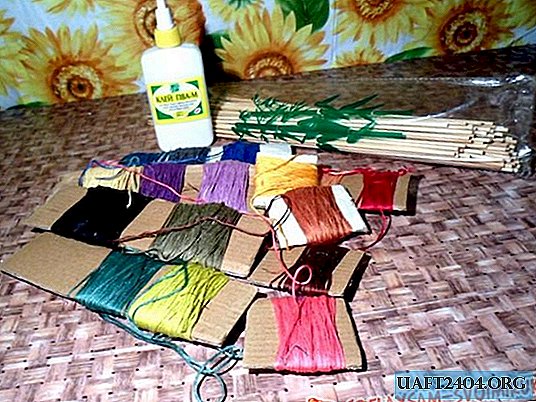
We take multi-colored threads (I have a mouline thread), wooden sticks (they are both long and short, but you can also wire), PVA glue (you can also gelatin or starch), and a cardboard for winding threads.

Now we need to decide on the sizes:
No matter what the size of the sticks, the threads should be 2/3 in length. That is, we divide the length of the stick into 3 equal parts, and of these 2 parts, this is the length of the thread.


And what would be faster and more convenient, take a cardboard for winding threads on it.
Now look at the sizes that I have:
- Wand - 30 cm.,
- Threads - 20 cm.,
- Cardboard length is 10 cm. Width is not so important.
Further actions:
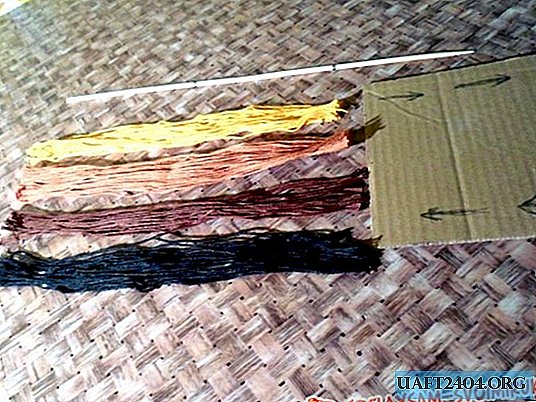
1. We wind the threads on cardboard for about 20-30 revolutions. Then cut in half and level. And so we do with all the colored threads. And when all the piles are ready, you can start using them.


2. We take a stick and 1/3 part departs from the bottom (bottom with a thick end, the top is pointed), and from there we begin to tie the threads with a single knot. If it will be convenient for you to work with the wand lying down, then do so. For example, I didn’t like knotting so, so I found a way out of which I took a jar heavier (with pebbles), made a hole for the stick in the lid, and so it took on me the appearance of standing, in which I began to knit a lot more convenient and faster.


3. And thus, thread by thread, color by color, we get to the very top. Leave the sharp tip a little empty, otherwise the threads can peel off during further processing. Now we need a convenient dish and glue. In it we will bathe our feather. I have thick glue, so I diluted it a little with water, just a little bit, otherwise it will remain on the surface and will not reach the inside of the thread.


4. It is necessary to carefully soak all the threads evenly, even if a little soaked. In the meantime, everything is saturated, we will lay out on the table any cellophane. On it we will place a slightly wrung out feather.

5. Take a similar stick and begin to gradually level and shape the threads. You should start from the top, while the upper threads need to be selected in the middle, connecting the two sides. And continue to give an upward direction to all threads.

6. After all the threads are combed, you need to slightly smooth them with the same wand. So they flatten out and lie more beautifully. And now in this form, you can leave the pen to dry until completely dry. In a warm place, this process will go faster. By the way, you can not worry, it will not stick to cellophane. I have a thick large garbage bag, it is both dense and does not take PVA, so it’s very convenient.
And I want to add, when the feather is ready, then you have the opportunity to make him a hairstyle, I personally like the edges in such a natural way, but you can cut them and make them more even.

I think if you add such feathers to any composition, for example, from flowers with your own hands, then it will look even more original and unusual. And if you play with flowers, or add shine (Lurix for example), or tint with shiny acrylic, then this can become a true decoration. The most important thing is not to be afraid to experiment!

Share
Pin
Tweet
Send
Share
Send