Share
Pin
Tweet
Send
Share
Send
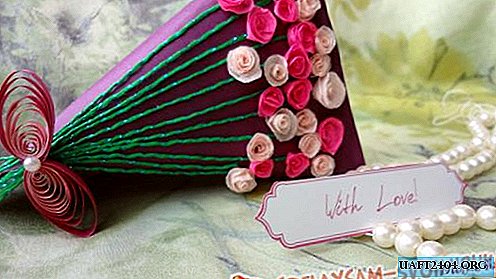
With the help of this master class, it is possible to create a designer packaging with minimal free time and having a little free time, which with its beauty and originality will certainly surprise the recipient.
Materials for the master class:
- a sheet of purple paper;
- corrugated paper of pink and light pink colors;
- green threads;
- ruler, scissors, glue.
Working process:
1. In this example, we will pack a small round jar of cream. To do this, put a jar of cream on a sheet of colored paper and visually determine the size of the future packaging.

2. We shall bend the side of the future packaging by 0.5 cm.

3. Glue to lubricate the top and side of the package.

4. Connect, you should get a package with one open edge.

5. Put a gift inside the box.

6. Seal the last edge of the package.

7. Threads of green color, cut into different sizes.

8. Thoroughly lubricate each thread with PVA glue.

9. Glue the threads to the front of the package, leave the ends not glued.

10. In the same way, glue all the threads.

11. From a corrugated paper of pink color we cut out a circle with a diameter of 3 cm.

12. Visually, or draw a spiral with a pencil. The more magnificent you want to get a rose, the more branched the spiral should be.

13. Cut the spiral with scissors.

14. We begin to twist the spiral from the middle to the edges.

15. Put the resulting rose on a flat surface, give it the opportunity to slightly unwind.

16. The free edge is fixed with glue.

17. In order for the rose to be conveniently glued to the packaging, we cut the sharp edge a little with scissors.

18. In the same way we make roses of light pink color.

19. We make a large number of such roses, which largely depends on the size of the package.

20. We begin to stick roses to the stalks.

21. If bumps have formed on the petals of our roses, cut them with scissors.

22. In the process of gluing and processing, rose petals could be deformed, so we straighten them with a toothpick.

23. We make a bow. We take two strips with a width of 0.5 cm and a length of 10-15 cm of light pink and dark pink colors.

24. Glue them together.

25. We begin to twist the roll using a quilling tool or split toothpick.

26. Put the resulting roll on a flat surface or in a special ruler and allow to slightly unwind.

27. We make two such rolls. We will give the resulting rolls a teardrop shape, slightly connecting the edges with your fingers. Glue them together.

28. The middle of the bow can be decorated with a decorative bead.

29. Glue the bow to the stalks.

30. That's all, our packaging is ready. We wish you success!


Share
Pin
Tweet
Send
Share
Send

