Share
Pin
Tweet
Send
Share
Send
To work, you need to find the following components:
- a piece of very dense cardboard (from the box);
- colored paper (dark brown and black);
- scissors;
- three wooden skewers for products;
- a tube of PVA glue;
- photo of the bench.
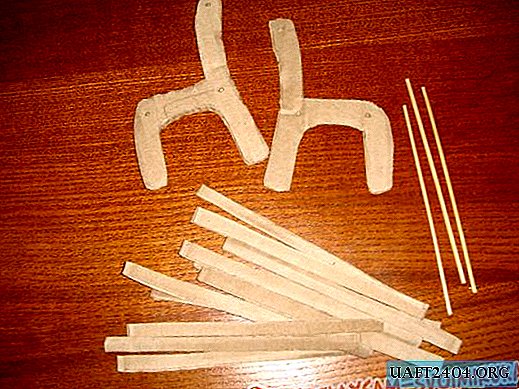
For starters, you need to determine the size of the bench from the photo. My finished product turned out to be of such dimensions: the height of the bench with the back is 12 cm, without the back - 6 cm, the width of the boards - 15 cm, and the width of the craft - 7 cm. Then you need to cut out all the necessary details from thick cardboard. These are: two side parts (12 cm by 8 cm); 8-10 strips 15 cm long and only 1 cm wide. Plus, cut three wooden skewers so that their length is about 12.5 cm.
Glue the side parts with black colored paper, on both sides. And wrap each strip (dostochka) in a sheet of dark brown color. Allow the glue to dry completely to make it more durable. To extend the life of the product, you can also wrap it with tape.

Now you should start assembling the parts. Take the wooden sticks and fix them on one of the side parts. To do this, you need to make three shallow holes on the workpiece (so that they do not pass through). Pour glue into them and put the sticks in those places in an upright position.

As soon as the glue dries, turn the work over and do the same with the second side part. Try to keep the workpieces even and parallel to each other.

Here is such a frame.

Now you need to stick the little things on the bench. Glue the edges of the black blanks with glue and apply brown stripes at some distance. Bottom fit 4 props.

Next, you need to turn the workpiece over and stick 4 more strips to the top edge.

As soon as the glue dries on the whole product, turn the craft over and check the bench for strength. To do this, you need to stagger a little and pull the details. My daughter, when she saw lacquer, said only one phrase that amused my vanity: "Thank you, that's what I wanted." She instantly planted her toys and started an exciting game.


Share
Pin
Tweet
Send
Share
Send