Share
Pin
Tweet
Send
Share
Send
To make a butterfly from polymer clay, which in the future will serve as an element to complement the ring, both an experienced master and a novice in modeling can do if he adheres to the recommendations given in the master class.
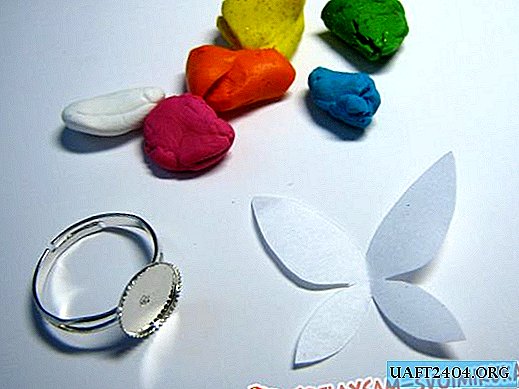
For the manufacture of colorful butterflies and interesting patterns of butterflies, balances of clay sticks of various colors are perfect. In this example, the clay used is white, raspberry, blue, orange, yellow with golden shines and lime with the same brilliant clay effect. You will also need a base ring and a paper stencil of a small butterfly, the basis of which you can take any butterfly picture from the Internet, print it and cut along the contour.

Knead each colored clay piece (leave a small piece of yellow clay intact) and roll into a sausage. We arrange the resulting sausages in the order in which we will assemble the flowers. The order of colors can be arbitrary, the main thing is that the colors coming in order are harmoniously combined with each other.

We connect the sausages together, if necessary, slightly squashing them during the assembly process.

The resulting element is twisted along its own axis into a "spring".

We twist the clay "spring" in a spiral.

Turn the workpiece over to the other side and gradually flatten it, gently stretching the edges.

We continue to stretch the disk in two directions until it turns into a rectangle.

Again, we perform twisting into a "spring".

And then - and into the "spiral" of polymer clay.

The resulting workpiece does not at all look like the bright patterned wings of a butterfly, but by cutting it and expanding the halves symmetrically, we find an interesting pattern weaving, unique and inimitable.

Squeeze and stretch the burnt clay elements a little to make them thinner, and apply a stencil cut along the axis - the left and right wings.

We cut the wings along the contour, put the blanks on foil and send to bake for 10 minutes at the temperature specified in the instructions for clay.

Meanwhile, the antennae is molded from the remaining yellow clay.

And set about modeling the butterfly body. We make sure that all elements fit each other in size.

We give the baked wings time to cool, we stick on top of them a finished body with attached antennae, trying in the process to maintain the connection of the wings at an angle of 100-120 °. We send the preparation to bake for 20 minutes.

We glue the butterfly that has cooled after baking to the base ring with any suitable glue. The result is a one-of-a-kind decoration with a unique color pattern on butterfly wings.

Share
Pin
Tweet
Send
Share
Send