Such a simple street table will ideally fit into the surrounding landscape of a summer cottage or a house adjoining territory. And in order to put this idea into practice, you will need a minimum of materials and tools to work.

The main stages of work
For the manufacture of countertops, an unedged board with a width of approximately 30-40 cm and an epoxy resin diluted with a hardener will be required. To get started, we saw the board into two parts and align the edge with a hand planer.
Next, in two halves of the countertop, drill three holes with a 10 mm pen drill, and then connect them using steel rods of the same diameter. For greater reliability, it is advisable to pour two-component glue into the holes.

It is not necessary to hammer boards tightly - there should be a small "groove" for the epoxy. Be sure to align the surface of the two halves of the countertop so that there are no differences in height.

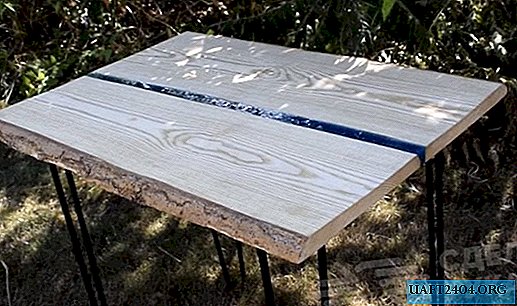
We seal the seam between the boards with reinforced adhesive tape in several layers, then fill it with epoxy diluted with hardener. Additionally, you can add blue watercolor paint to it.

After the epoxy is dried, the home-made "formwork" is removed from the adhesive tape, and the surface of the countertop is sanded and covered in 1-2 layers with mineral oil or colorless varnish.
Table legs

At the last stage of the work, it remains only to “dilute” the composition of wood and epoxy with metal legs, which are screwed onto the countertop with self-tapping screws. The result is a nice street table, where you can have lunch or just drink a mug or two of coffee or tea with friends.