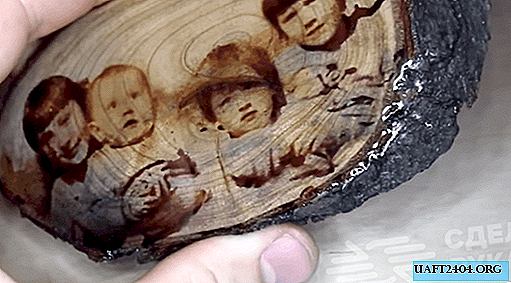
You can turn your favorite photo into a very original photo, which will be “drawn” on the surface of the tree. Such a composition looks simply incomparable, especially if after transferring the image to varnish the surface of the wood.

To transfer a photograph to the surface of a wooden blank, you need a base (for example, a piece of plywood, a board or sawed log), as well as an image that must be displayed in a mirror spread, and then printed on a laser printer - on a sheet of A4 paper.
Before you print a photo, it is advisable to slightly process the image in a graphical editor - you need to make the photo monochrome, and also enhance the contrast. After performing these simple operations, the finished picture will turn out to be better and more expressive.
Step-by-step photo transfer process
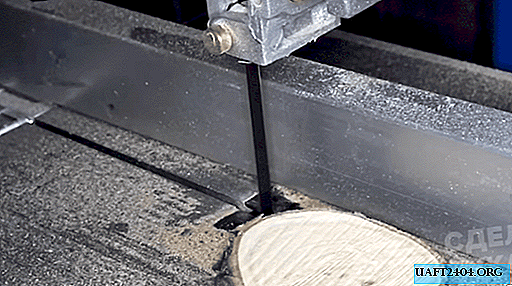
First of all, it is necessary to prepare the basis for the future photo - for this, the oblique saw cut of a fruit tree (apple tree, pear, cherry) is perfect for this. We grind the workpiece using a grinder with a petal wheel or on a belt grinding machine so that the front surface is even and smooth.

At the next stage, we print the photo processed in the graphic editor, and crop it along the contour of the saw cut of the tree.

A thick layer of wood glue is applied to the surface of the wooden blank, after which we apply a printed image on top. Leave for 24 hours.

Then we wet the paper with ordinary warm water and remove it with your fingers - it is undesirable to use scrapers or other metal objects for this.

There is no need to rush so that you do not have to redo everything all over again. The surface of the photograph is varnished or epoxy.