Share
Pin
Tweet
Send
Share
Send

Often, deep scratches appear on the doors and on other surfaces of the car, which intersect not only the top varnish coating, but also the paint itself with the soil. It is not possible to remove such defects using ordinary polishing or a marker. There is a painstaking but effective way of self-repairing the paintwork on scratches so that the repair site remains invisible.

Materials and Tools Required
The proposed method is not free, since it will require the purchase of paints and varnishes. Nevertheless, this will cost less than an appeal to a professional auto-dealer.
From the materials you will need:
- degreaser;
- paint;
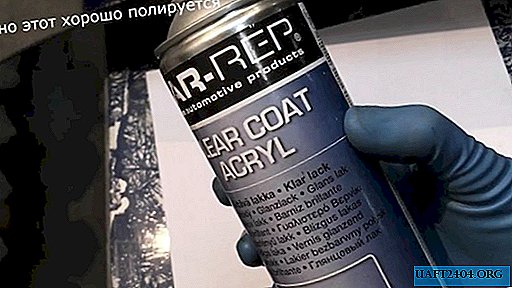
- acrylic lacquer;
- abrasive paste for primary processing;
- polish for finishing.
You also need to prepare the tools:
- a set of sandpaper sheets with grit P120, P1000, P2000 and P3000;
- 5 syringe medical syringe cm - 2 pcs.;
- masking tape;
- medium hard polishing wheel;
- soft polishing wheel.
Deep Scratch Removal Procedure
First you need to polish the scratch to remove the sharp corners resulting from the deformation of the varnish. This must be done with emery paper with a grit of P2000. Wet grinding with moistening with a degreaser is used.

It is strictly forbidden to moisten with water, since in the presence of open areas of metal rust will appear.

You need to collect a small amount of paint in a separate container and fill it into a syringe with a nose cut off at 45 degrees.


Permissible use of paint with a slight discrepancy in tone.


It can be purchased in a spray can and simply sprayed into a cap in a volume of 1-2 ml, or bought for bottling in an enamel store.
The paint from the syringe is squeezed out onto the scratches with a thin line. It turns out at a time to apply a thicker layer than when using an art brush. After drying, you need to cover the scratch with another coat of paint, in the same way.


After the second layer hardens, the scratch acquires a convex relief, which should be removed. To do this, use the same P2000 sandpaper. It fits on a miniature block, about 2x4 cm in size.

It can be carved from wood or foam grater for plastering.

Before applying zero sandpaper, the working surface of the block needs to be leveled. This can be done by polishing the desired side on the P120 sandpaper by first placing it on a glass or mirror to achieve a perfectly flat plane.

Lightly move the protruding paint along the scratch line.

Wet grinding is used, but with wetting with water, since the paint completely covers the bare metal and rust will not occur.


After polishing, apply a layer of varnish on top of the restored base.

This is done with a new syringe with a cut nose at 45 degrees.

You can use a two-component varnish or acrylic composition from a spray can, after spraying it into the cap. It is necessary to try to squeeze the varnish from the syringe in one layer without the formation of gaps.

When the fresh varnish dries, masking tape should be glued to the sides of the scratch. It will protect the old coat of varnish so that it does not rub during grinding.

First, apply sandpaper P1000 to the existing block, and use it to remove a thick layer of fresh varnish applied with a syringe. The masking tape running along the rim will prevent the removal of adjacent surfaces. Grinding is carried out with water.
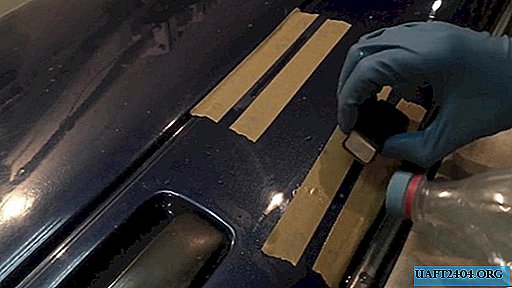
Next, you need to tear off the old adhesive tape and stick a new tape along the scratches, but a little wider. After that, re-grinding is carried out already with emery cloth P2000.
Tearing off masking tape again, you can proceed to polishing by applying P3000 sandpaper. Periodically, it is necessary to wet the surface with water to prevent overheating, as well as washing off the dust. It should be polished until the transition between the old and the new varnish is completely hidden.


The surface sanded with sandpaper is matte, so it needs to be refined to a state of gloss.

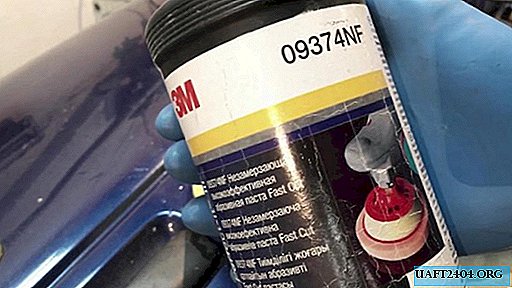
To do this, start polishing paste is applied. It can be bought in a small tube or by weight from a large can. Polishing is carried out using a medium hard sponge polishing wheel. It can be put on a drill, screwdriver or grinder. When working, you need to set the average speed and add water. You can not press hard so as not to remove too much varnish.


For final polishing, you can apply the finishing paste and soft polishing wheel. In the event that the varnish on the machine does not have a high gloss, then the final polishing may not be necessary at all, so as not to highlight the restored place against the general background.


Work on painting deep scratches can take several business days, because you will have to observe technological pauses between applying layers of paint and varnish. If you buy all the materials for a spill, then it is quite possible to count on budget repairs, which will cost less than a painter. If you want to save even more, you can do only with a soft sponge polishing wheel and one universal abrasive paste during the final treatment. The main thing at all stages of grinding and polishing is not to forget to wet the surface, not to press and act especially carefully on the relief details, since they are very quickly wiped.


Watch the detailed video
Share
Pin
Tweet
Send
Share
Send