Share
Pin
Tweet
Send
Share
Send
For high-quality tile laying, the method of applying tile glue (masonry mortar) is of great importance. As you know, porcelain tile is not afraid of the most difficult operating conditions. If, by all rules, it is laid on the base, then a large impact force is required so that the tile loses adhesion with the masonry mortar or a solid base.
This can only be achieved with the correct adhesive application technique using a notched trowel. But since the tile, along with hardness, is fragile, like glass, the places under the tile that are not filled with masonry mortar become potentially weak. If this happens with porcelain stoneware, then a not too strong blow, dosed load and other non-fatal causes can cause it to peel off or damage.
Also, tiles should not be laid without a gap, although this simplifies the work of creating a tile coating. In this case, the most insignificant circumstances, for example, an increase or decrease in temperature, can cause damage to the tiles. In such situations, ANSI (American National Standards Institute) standards recommended by NTCA (National Tile Contractors Association) are also required.

In many cases, when laying tiles, especially large ones, the technology of work is violated, which causes breakdowns and expensive repairs. The rush in work leads to the same, since the quality of the work performance suffers.


One of the serious drawbacks when laying tiles is the trapping of air between the tiles and the adhesive. The places where the air pockets form are weakened, since they remain not glued to the base.


Such a defect is often observed when the masonry mortar is distributed with a notched trowel in zigzag, circular and other intricate movements.

The tiles above the voids crack with time, and the adhesive composition also breaks down under normal operating conditions, what can we say about a point load or a strong blow.

Even in the absence of shock loads and pinpoint forces, tiles laid in violation of the distribution of masonry mortar can fail even due to minor effects, such as: unevenness of the base, the presence of shrinkage and creep, expansion of the material when heated, alternating freezing and thawing and etc.

A tile is considered to be securely bonded when done over its entire area, including the perimeter. What strength can we talk about if it is glued half or less. According to ANSI and the TCNA handbook, indoor tiles should be glued to at least 80% of their area and 95% - outdoors or in a damp room. This indicator for natural stone tiles should be at least 95%, regardless of where it is installed.
It should also be borne in mind that often among large tiles there are specimens with a protruding center and beveled edges. To hide these defects, you have to increase the amount of adhesive used. If you continue to apply it with circular motions of the notched trowel, then the likelihood of pinching air inside the solution increases even more.

It is very important for high-quality laying of large format tiles that the horizontal flatness of the base is ideal. According to the recommendations of TCNA and ANSI, the flatness error of the floor should lie within 6.5 mm by 3 meters. If at least one side of the tile is 38 cm, then the conditions for flatness of the base are even more stringent - 3.2 mm by 254 mm and even not more than 1.6 mm by 610 mm.
So, taking into account all the factors, for successful laying of the tile, the masonry mortar must be applied by the linear movements of the notched trowel. As a result, straight ridges and depressions form on the surface of the mortar, which are easily crushed when laying tiles, and air is almost completely removed from them.

Such a straightforward distribution of the adhesive composition helps to remove air from it and more complete contact with the tile and the base, and therefore a stronger bond of all elements of the floor covering.


First, the masonry mortar is applied and spread on the base using the flat side of the spatula. Then an additional amount of the solution is applied on top and evened out on the base with straight unidirectional lines, which, among other things, contributes to a better distribution of the adhesive composition.
If the tile is rectangular, then the lines drawn with a spatula should be perpendicular to the long side of the tile. This makes it easier for air to escape from under the tile when laying it.
Care must be taken to ensure that air does not remain in the depressions of the mortar and between the tiles. The larger the tile, the deeper the teeth should be at the spatula.
Before laying any tile, including large-format, glass or natural stone, a small amount of mortar is placed on its reverse side with a trowel and evened out over the entire surface with an even layer with the flat side of the spatula.
Now it is necessary to turn the tile thus prepared, turn it over and carefully lay the entire surface on the prepared layer of masonry mortar and move it several times in one or the other direction with an amplitude of 3.2 to 6.4 mm perpendicular to the ridges of the adhesive solution lying on the base. Moreover, it is categorically not recommended to move it in the opposite direction and not twist the tile.


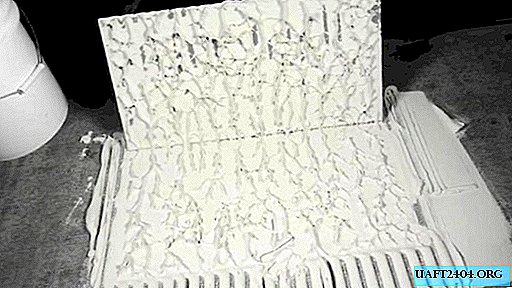
The first glued, and subsequently periodically, it is necessary to tear off the tile and check the distribution of the solution from its reverse side. It is normal when the solution looks like shagreen skin on it. On the masonry mortar in the place of separation of the tiles there should be no ridges left by the spatula. This picture suggests that there is no air under the tile, and the glue is distributed over the entire surface in an even layer.


If you correctly and fully comply with all the NTCA recommendations set forth above, then your tile will lie on the base evenly and very firmly. Moreover, the larger the spatula you use, the greater should be the movement of the tile back and forth when laying it.
Share
Pin
Tweet
Send
Share
Send