Share
Pin
Tweet
Send
Share
Send
Small copies of various LED flashlights can be bought at almost any store. They are inexpensive, but the build quality can sometimes not please. Whether it’s a matter of home-made devices that can be made on the basis of the simplest parts. It is interesting, informative and has a developing effect on lovers of tinkering.
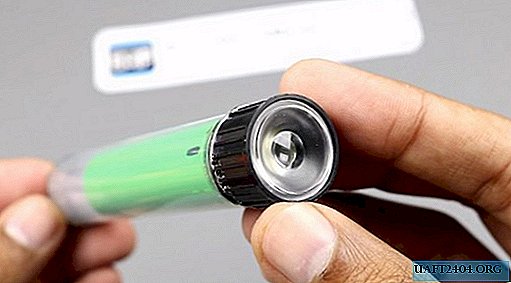
Today we will consider another homemade product - an LED flashlight, made literally from improvised parts. Their cost is not more than a few dollars, and the efficiency of the device is higher than that of many factory models. Interesting? Then do it with us.

The principle of operation of the device
This time, the LED is connected to the battery only through a 3 ohm resistance. Since there is a ready-made source of energy in it, it does not need a storage thyristor and transistor for voltage distribution, as is the case with the eternal flashlight Faraday. An electronic charging module is used to charge the battery. The tiny micromodule provides protection against voltage surges and does not allow recharging of the battery. The device is charged from the USB connector, and the micro USB connector is located on the module itself.
Necessary Details
- 20 ml plastic syringe;
- 3.4 V / 3 W LED;
- Lenses for LED flashlight with housing;
- Micro-button switch;
- 3 ohm / 0.25 W resistor;
- Micromodule recharging TP4056;
- A piece of aluminum plate for the radiator;
- Several copper wires;
- 3.7 V battery;
- Superglue, epoxy or liquid nails.
Of the tools you will need: a soldering iron with a flux, a glue gun, a drill, a lighter and a paint knife.

Putting together a powerful LED flashlight
LED preparation with lenses
We take a plastic cap with lenses, and mark the radiator circumference. It is needed to cool the LED. On the aluminum plate we mark the grooves, holes and cut out the radiator according to the marking. This can be done, for example, with a drill.


We take out magnifying lenses for a while, now they will not be needed. On the back of the cap, glue the radiator plate onto the superglue. The holes, grooves on the cap and radiator must match.


The contacts of the LED are soldered and soldered with copper wiring. We protect the contacts with shrink cambrices, and warm them with a lighter. We insert an LED with wiring from the front side of the cap.


Syringe flashlight body treatment
We unlock the piston with the handle at the syringe, we will no longer need them. We trim the needle cone with a paint knife.
We completely clean the end of the syringe, making holes in it for the LED contacts of the flashlight.
We attach the cap of the flashlight to the end surface of the syringe on any suitable adhesive, for example, epoxy resin or liquid nails. Do not forget to put the LED contacts inside the syringe.


Connecting the charging micromodule and battery
We fix terminals with contacts on a lithium battery and insert it into the syringe body. We tighten the copper contacts to clamp them with the battery case.

The syringe only has a few centimeters of free space, insufficient for the charging module. Therefore, it will have to be divided into two parts.
We draw a paint knife in the middle of the module board, and break it along the cut line. Using double adhesive tape we connect both halves of the board together.


We open the contacts of the module and solder it with copper wiring.


Final assembly of the flashlight
We solder the resistor to the module board, and connect it to the micro-button, isolating the contacts with heat shrink.


The remaining three contacts are soldered to the module according to its connection diagram. We connect the micro-button last, checking the operation of the LED.


We place the electronic filling of our device in the syringe body so that the micro USB connector and the micro-button remain on the surface. We isolate the rest of the space with hot glue. We install the LED lenses back in their place on the front side of the cap.


We put the battery on charge, and after a while the LED on the charging module will let you know that our flashlight can already be used. By the way, according to the author, such a flashlight can work on one charge for about 10 hours!


Share
Pin
Tweet
Send
Share
Send

