Share
Pin
Tweet
Send
Share
Send
Compressors from refrigerators often remain operational after a breakdown or obsolescence of the refrigerator itself. They are low-power, but unpretentious in work. And many masters of them make quite worthy home-made installations. Let us and we will see how this can be done with our own hands.
Details and materials
Necessary Details:
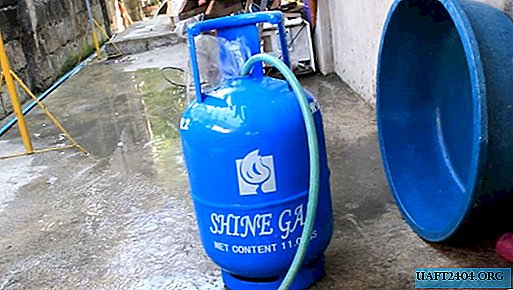
- 11 kg propane tank
- 1/2 inch coupling with internal thread and plug;
- Metal plates, width - 3-4 cm, thickness - 2-4 mm;
- Two wheels with mounting platform;
- Refrigeration compressor from the refrigerator;
- 1/4 inch adapter
- Brass check valve connector;
- ¼ inch copper pipe coupler - 2 pcs;
- Equipment for compressor pressure adjustment;
- Bolts, screws, nuts, fumlent.
Instruments:
- Welding inverter;
- Screwdriver or drill;
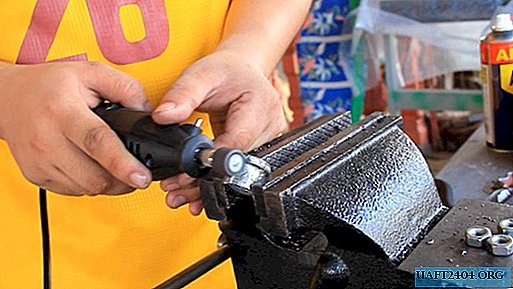
- Milling cutters with titanium coating;
- Turbine or drill with abrasive nozzles;
- Brush for metal;
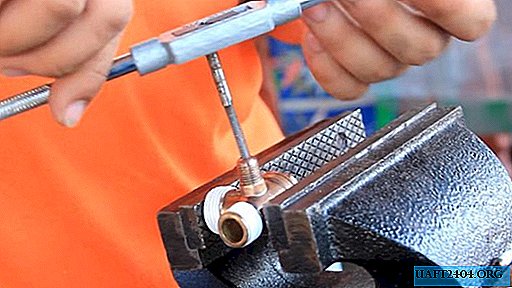
- Roller for copper tubes;
- Adjustable wrenches, pliers.list
Assembling a compressor
Step one - prepare the receiver
We wash the empty cylinder from liquefied propane thoroughly with water. It is very important to remove all residual explosive gas mixture in this way.
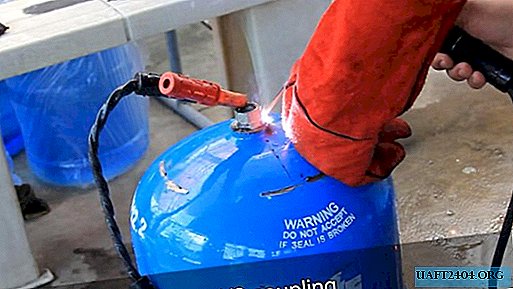
We put an adapter on 1/4 inch into the end opening of the cylinder. We weld it from all sides, and plug it with a screw.
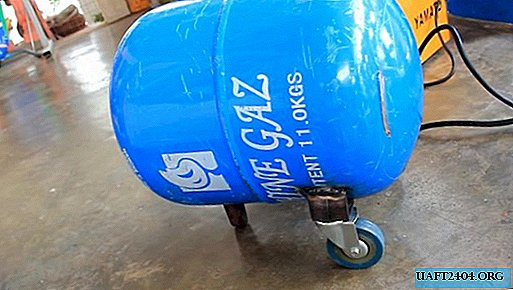
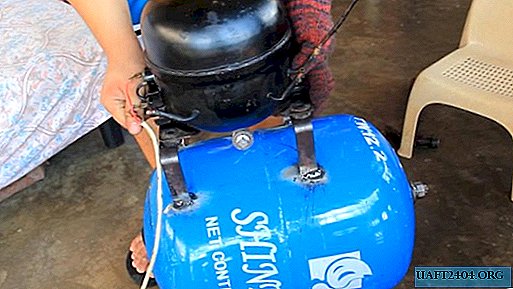
We put the receiver on wheels and support. To do this, take pieces of metal plates, bend them at an angle and weld onto the body from the bottom. We weld the wheels with the mounting platform to the corners. In front of the receiver we mount a support bracket.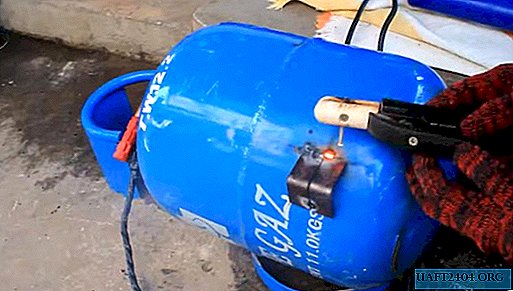
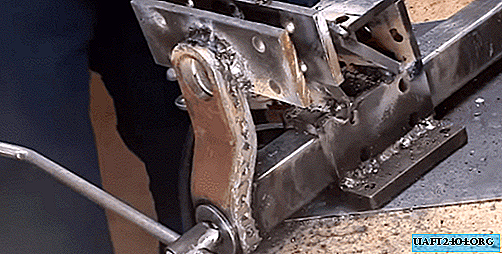
Step two - mount the compressor
On top of the receiver we set the mounting frames for the compressor from metal plates. We check their position with a bubble level, and scald. The compressor is mounted on the clamping bolts through rubber shock-absorbing pads. For this type of compressor, only one outlet will be involved, through which air is pumped into the receiver. The remaining two, sucking in air, will remain intact.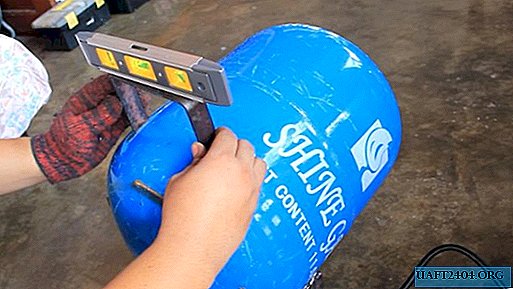
Step three - we fix the check valve and the adapter to the equipment
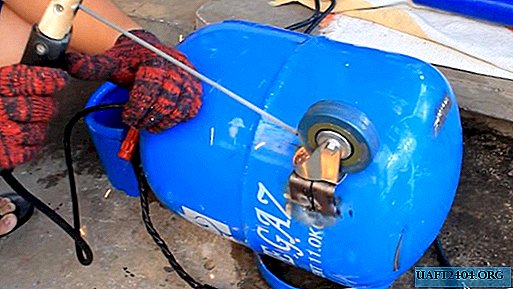
We select a suitable metal mill for the diameter, and make a hole in the housing for the coupling with a screwdriver or drill. If there are protruding forms on the clutch housing, we grind them with a drill (you can use a regular electric rail or a grinder with a grinding disk for this).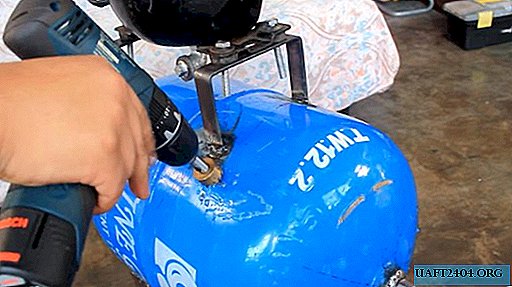
We expose the coupling into the hole and scald it around the circumference. Its internal thread must match the pitch and diameter of the thread on the non-return valve.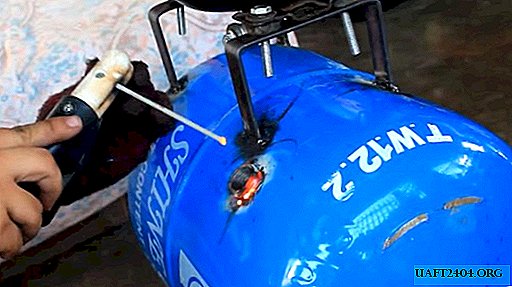

We use a brass check valve for small compressors. The outlet for releasing the pressure is drowned out with a suitable bolt, since a drain valve is already provided on the adjustment assembly.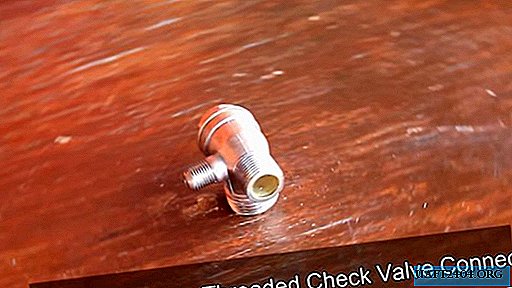
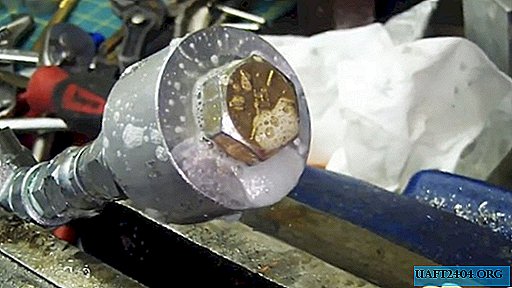
To install a pressure switch or pressure switch with all control equipment, we mount another 1/4 inch adapter. We make a hole for it in the center of the receiver, not far from the compressor.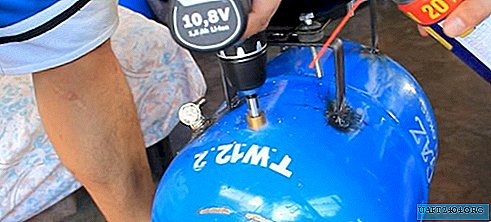

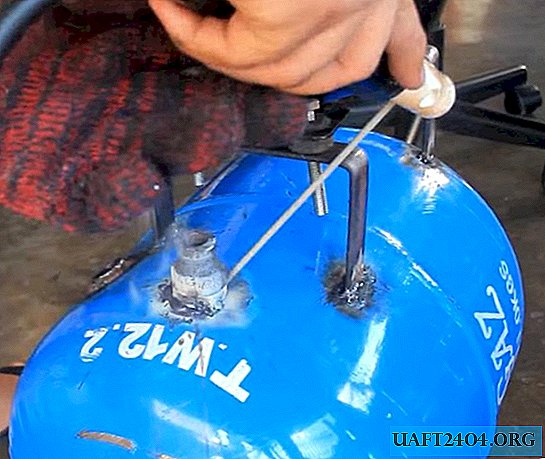
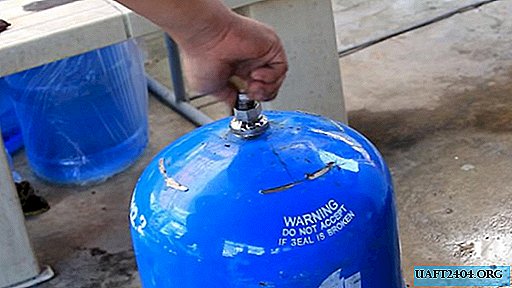
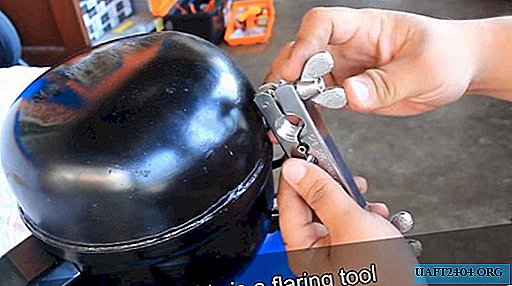
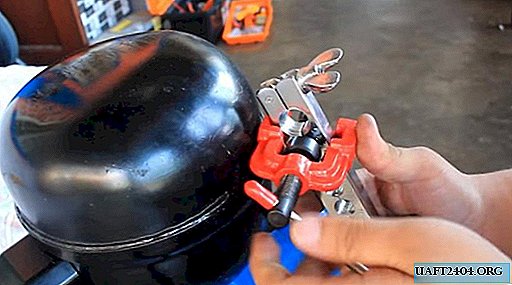
We twist the check valve with an adapter 1/2 inch.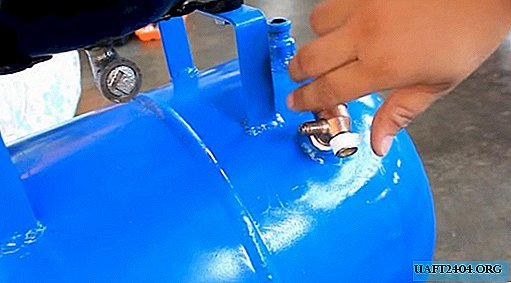
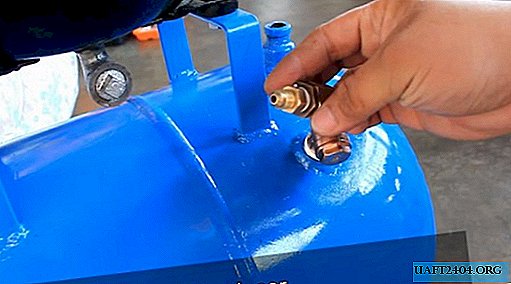
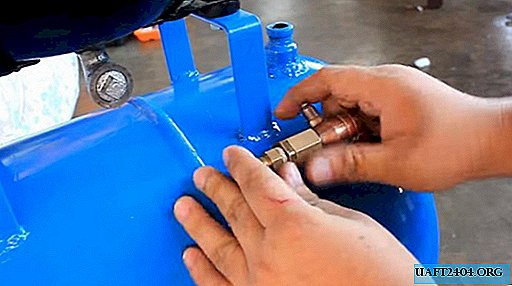
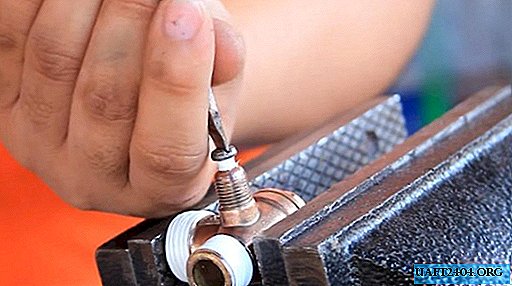
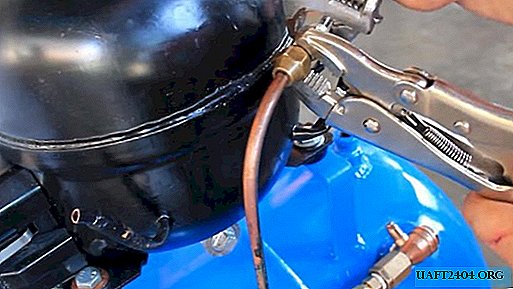
We connect the compressor cylinder outlet and the check valve with a copper tube. For this, we use a special tool to expand the ends of the copper tubes, and connect them with brass threaded adapters. We tighten the connection with adjustable wrenches.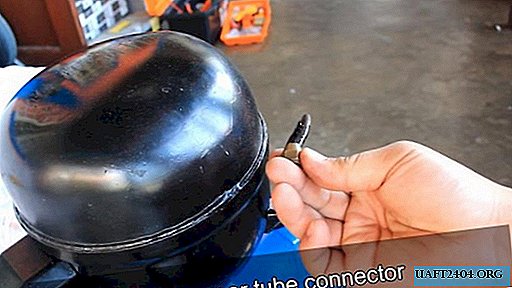
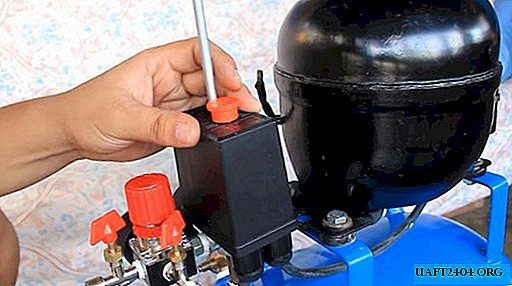
Step Four - Install Adjustment Equipment
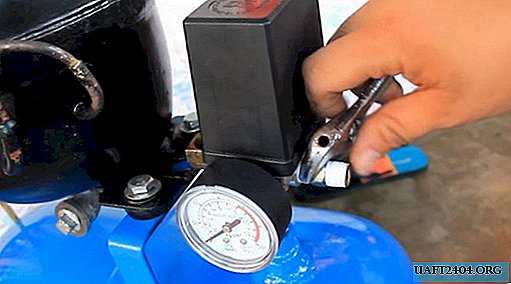
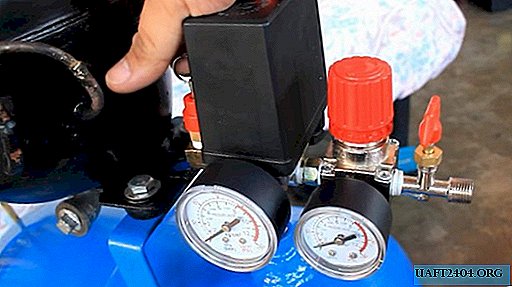
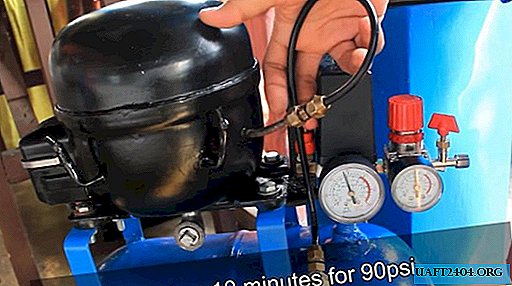
The assembly of control equipment consists of a pressure switch (pressure switch) with a control sensor, a safety valve or pressure relief valve, an adapter coupling with an external thread and several valves and pressure gauges.
First of all, we mount the pressure switch. It must be slightly raised to the compressor level. We use an extension sleeve with an external thread, and we twist the relay through the sealing fumlent.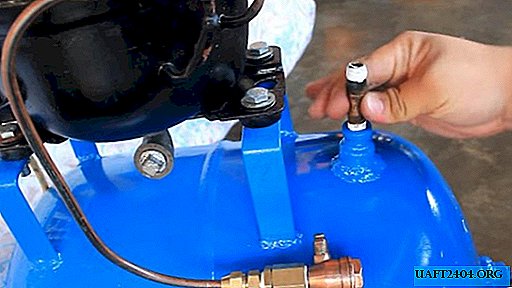

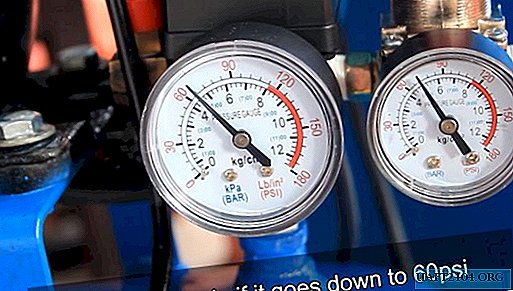
Through the adapter we install a pressure adjustment sensor with pressure gauges. We complete the assembly with a pressure relief valve and two taps for hose exits.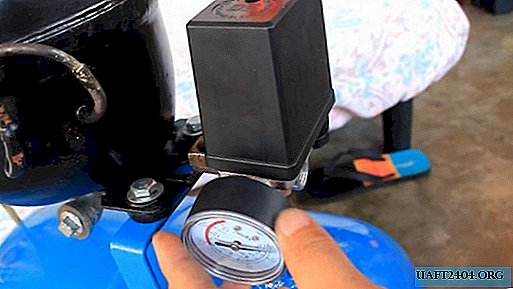


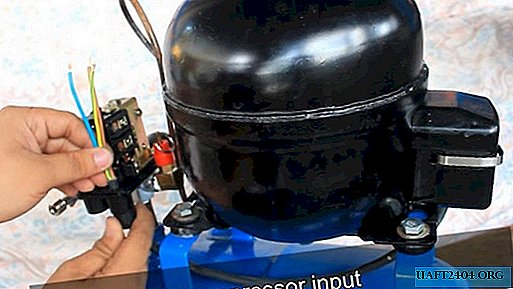
Step Five - Connect an Electrician
We disassemble the pressure switch case with a screwdriver, opening access to the contacts. We bring a 3-core cable to the contact group, and distribute each of the wires according to the connection diagram (including grounding).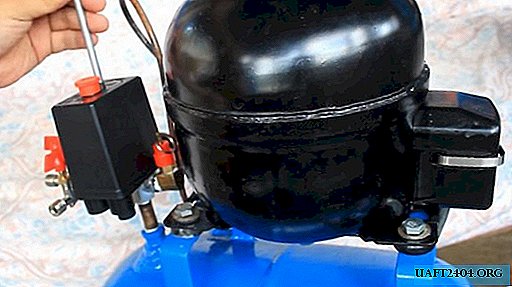

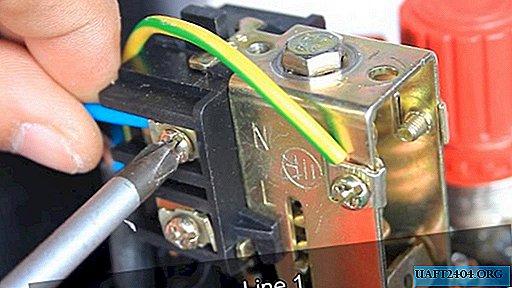
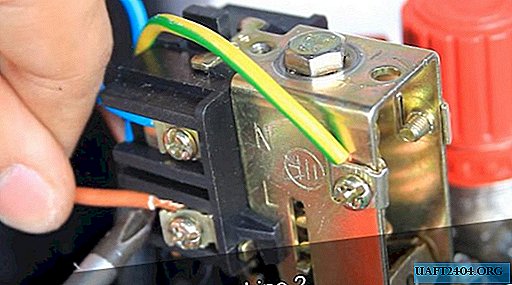
In the same way, we make a lead-in of a power cable equipped with a plug for a power outlet. We twist the relay cover back into its place.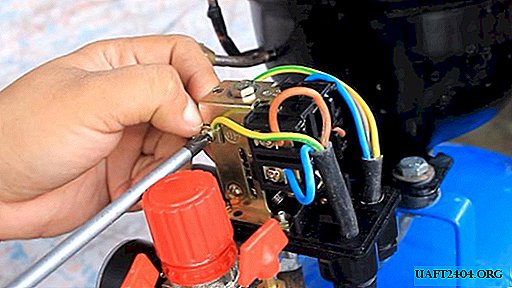
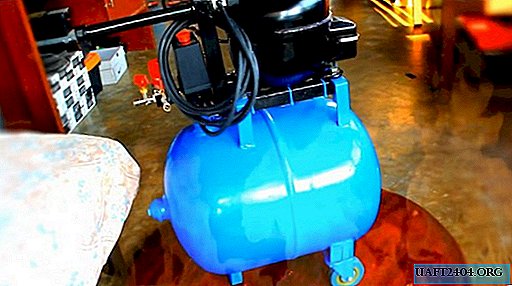
Step six - finalization and trial run
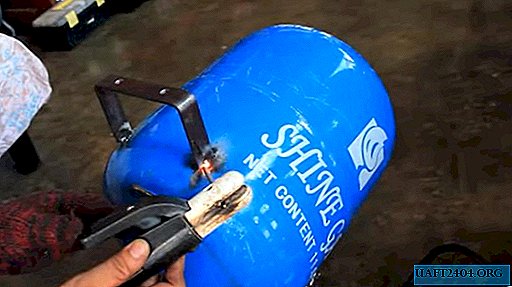
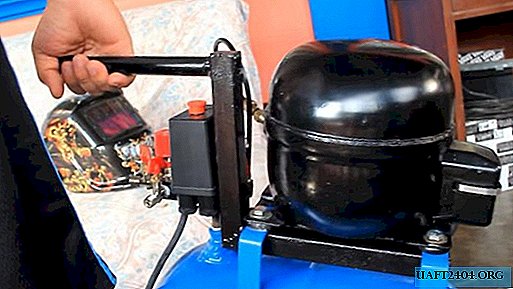
To carry the compressor unit, we attach a special handle to the compressor frames. We make it from scraps of a profile square and round pipe. We fix it on the clamping bolts and paint it in the color of the compressor.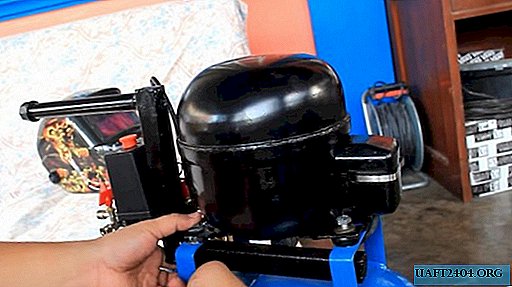
We connect the unit to a 220 V network, and check its operability. According to the author, to obtain a pressure of 90 psi or 6 bar, this compressor needs 10 minutes. Using the adjustment sensor, the compressor on after a pressure drop is also regulated from a specific indicator displayed on the pressure gauge. In his case, the author set up the installation so that the compressor turned on again from 60 psi or 4 Atm.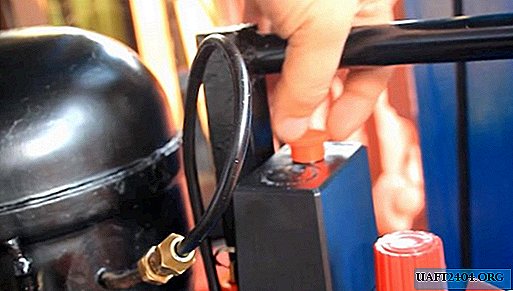
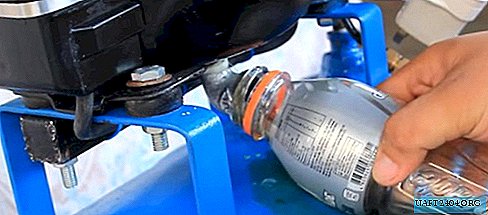
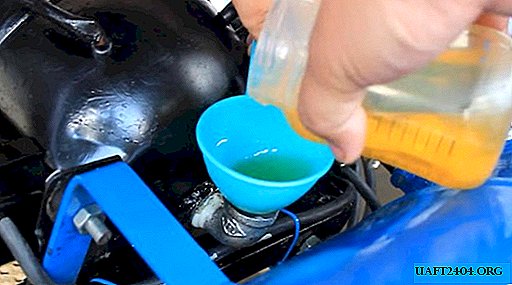
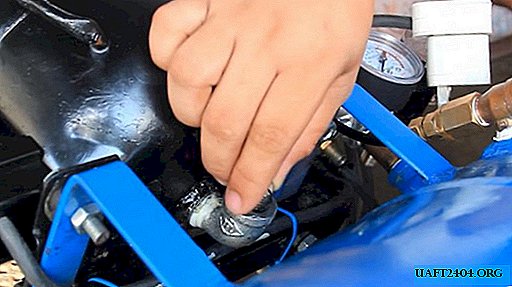
There was the last operation - oil change. This is an important part of the maintenance of such installations, because an inspection window is not provided for in them. And without oil, such machines can work for a very short time.
We unscrew the drain bolt at the bottom of the compressor, and drain the working out into a bottle. Turning the compressor on its side, pour a little clean oil, and screw the plug back. Now everything is in order, you can use our compressor unit!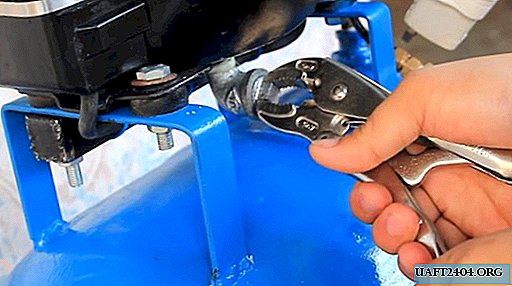
Conclusion
Compressor equipment is considered low-power and practically domestic. It is unlikely that it will pull the work of several pneumatic tools at once. But it can be used for low-power devices, for example, for airbrushing or tire inflation. It’s also a great way to use an unnecessary refrigeration compressor and give it a second life in your home workshop.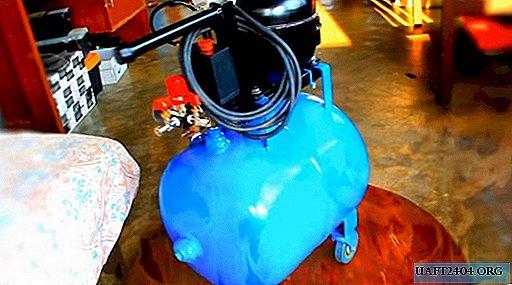 SharePinTweetSendShareSend
Watch the video: What's inside a Refrigerator Compressor (December 2024).