Share
Pin
Tweet
Send
Share
Send
In the proposals of furniture stores you can find tables of various designs, however, those who distinguish a screwdriver from a chisel can make their own original coffee table on their own. What is needed for this? First of all - the material from which the table, tool, fasteners, rollers, tape measure will be made. Our table will be made on the basis of laminated particleboard or from the waste of an old, old-fashioned wall.
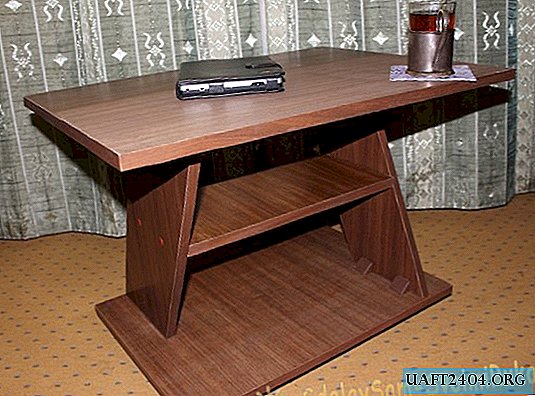
We come up with the appearance of our table and draw a sketch. Better yet, immediately make a drawing so that all sizes are visible. The little table with us will consist of an upper and lower cover fastened by side walls, and in the middle there will be a shelf for small things (it also serves as a spacer to enhance the strength of the structure). With dimensions, everything is strictly individual, but do not forget that the coffee table cannot have the dimensions of a dining room. The top table lid from the example will be 65 cm long and 45 cm wide.

Accordingly, the bottom cover will be 55x35 cm in size. The projection of the side wall support is 20 cm. The length and width of the middle shelf are 46 and 20 cm. The height of the table is taken to be 45 cm, excluding rollers. Confirmats, furniture plastic and metal corners will be used as fasteners.

Mark on the plate the dimensions of the upper and lower covers, sidewalls and middle shelf. Then, along the planned lines, we cut out the details with the help of a jigsaw. Particleboard surface has a high tendency to chip formation, therefore, we must try to reduce the influence of various factors on this process. The jigsaw file should have the smallest tooth, and the speed regulator on the tool must be set to 0. However, even with such measures taken, chips and burrs can still appear, so after sawing you need to go through the rasps along the slices, moving the tool only "away from you" " When cutting sidewalls, it is better to use clamps and pull both plates “face” inward. So we get exactly the same details. Thus, we get all the blanks of our table.
Next we need to collect the middle part of the table. In order not to spoil the parts, we first outline and drill all the necessary holes, and then make a preliminary assembly. We put the sidewalls vertically (for alignment) and measure the middle, along this line the middle shelf will be attached. We drill along the line 2 holes for confirmations. If there is no special drill, then you can use three ordinary ones - for the threaded part, for the thickening and for the hat. In order for the holes to be at the same distance, and, accordingly, the middle would be aligned, you need to fold both sides and drill them at the same time. After that, you need to do the same operation with the shelf itself, making holes in its ends (be sure to try on the sidewalls).

After pre-assembling the middle and evaluating the correctness of the actions, you can proceed to the next step. Now you need to glue the ends of the parts with a decorative edge (it is sold in any building supermarket). This will require a heated iron. We apply the edge with the adhesive side to the end and gently iron it with a hot iron. Make sure that no voids form under the edge. If the width of the decorative ribbon is greater than the width of the end, then cut off the excess with a wallpaper knife and clean the sections with a fine emery cloth.


The next step is to attach the middle to the lower and upper covers. We place the middle part exactly in the middle of the upper surface of the lower cover. Here you need to carefully measure the distance from the edges, so as not to get a bias. As fasteners we use furniture corners, which are attached to the parts with self-tapping screws. With the top cover we do the same.


Now we only need to fasten the rollers. On the lower surface of the lower cover we mark the places for installation, observing the same distances, and with the help of self-tapping screws we strengthen the rollers. It remains to close the confirmation hats with decorative caps and put the table in its place.
Without spending a lot of effort, not looking for a suitable model for shopping and without spending a family budget, you can completely safely make a coffee table yourself.
Share
Pin
Tweet
Send
Share
Send