Share
Pin
Tweet
Send
Share
Send
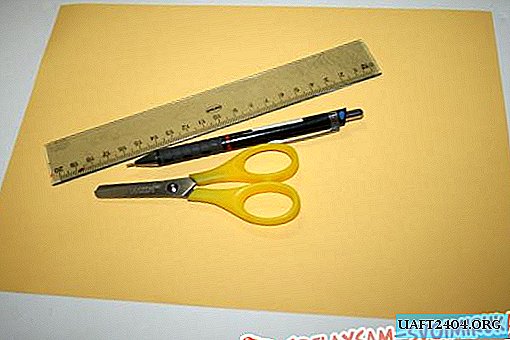
Materials needed for work:
- sewing machine.
- a soldering iron with a sharp tip.
- dense white fabric.
- filler.
- needle with thread.
- scissors.
- acrylic paints.
- wire.
- yellow tape 2 cm wide.
- brown eye shadow.
- a pencil.
- black pen.
- brushes for paints.
- Polish for hair.
- foil.
- a plastic small jar with a lid.
- golden paint.
- glue gun.
- iron ruler.
- toilet paper.
- PVA glue.
- a small glass.
- tea bag.
- Satin green ribbon 5 cm wide.
In the beginning we will draw templates. The leaves have an unusual shape, similar to a Christmas tree. And the head resembles a pear. Separately, we sketch the drawing of the eyes, nose and mouth.

Then we fold the white dense fabric in two layers and circle the head. We sew on the machine along the contour, leaving a segment where the neck will be attached. Carefully cut out with small allowances.

Then we turn it through a free segment and take the filler.

Well stuffed, and the hole is not yet sewn.

Now you need to make a stalk of dandelion. We take the wire, in its length we take into account the lower part for fastening, height to the head, which is 1.5 times higher than the selected can. And a small ring will be at the top, which will go into the head. From the green ribbon we cut the desired length of the segment.

Then we simply wrap it around the wire and glue it, we get the stem.

Then we attach this blank to the head, sew and glue it.

Now we turn to work in the technique of primed textiles. We paint one side of the head with white acrylic. And when it dries, draw the contours of the muzzle with a pencil.

Then with a pen we draw these contours, adding small details.

Now we take the shadows and a foam brush with a brown tone of shadows gently pass around the eyes, under the nose and mouth. Lightly outline cheeks. Then it should be sprayed on the face with hairspray to fix the shadows on the fabric.

And then we take acrylic paints. Draw the eyes. A black pupil, a blue part and a white strip. And from the pupil, add blue paint even from above.

We turn to the yellow nose and enhance the brightness of the cheeks.


To complete work on the face, you should again go through all the contours with a pen and add eyebrows, eyelashes, freckles, and glare in the eyes. The head is ready.

We turn to the manufacture of leaves. We will use the technique of burning through the fabric. We take a wire and a soldering iron with a thin tip.

The length of the leaves is slightly higher and lower than the main stem. They can be made 5-6 pieces. And accordingly, we cut segments from a green ribbon, two pieces per leaf. Next, take the wire a little longer by 5 - 7 cm. And then glue it to each sheet in the middle and between two ribbons. Then we place the blanks on the glass and with a soldering iron we draw the shape of the sheet. Or repeat along the outline of the template.

Now move on to the colors. We prepare two segments of 20 cm of yellow tape. We cut them with a soldering iron and an iron ruler with a fringe.

And proceed to the assembly of dandelions. For one flower, take a chopped ribbon, wire, 5 cm smaller than the main stem and add for fastening. Still need a piece of the whole tape and a ball of foil.

Glue foil to the stem.

And with a piece of a whole tape we glue the foil tightly.

Next you need to attach the fringe and the flower blank is completed.

And we have two dandelions.

Now we need sepals. And from the green ribbon you need to cut like grass. On a strip of 10 cm with a soldering iron we draw a line in the middle, similar to sharp teeth. It seems like we are dividing the tape in half, but with an uneven line. You should get two weed.

It remains only to glue them to the bottom of the flowers.

But we still have a bald main head. To do this, cut the yellow 10 strips of 18 cm. And make a beautiful fringe out of them.

Then glue each strip into a separate brush.

It remains only to fluff up their hands.

Now we glue this hair to the head while standing. The first three are located at the forehead.

Further in a circle we descend to the neck, distribute 4 more beams.

And the remaining 3 brushes are glued in the middle of the resulting circle.

Now go to the jar with a lid. With a soldering iron in the lid we make several holes.

They are needed for tight fastening of parts of the composition. The first we fix a dandelion with a face.

And the rest we have in the center of the lid.


Further we will make a flower pot with a secret from a jar. Lubricate the center of the lid with PVA glue and sprinkle with tea bag tea leaves - this will be peat.

While this will dry out, let's proceed to decorate the rest of the jar. We turn upside down and gradually glue pieces of toilet paper connected to PVA glue. We create volumetric irregularities.

Now again go to the lid. Here we add from the top along the edge a volume of the same paper.

And when the glue has dried well, we decorate the resulting flower pot with golden paint. And in addition, we fasten the yellow ribbon with a bow on the side edge of the lid.

It remains only to straighten all the details on the wire in the best direction for you.

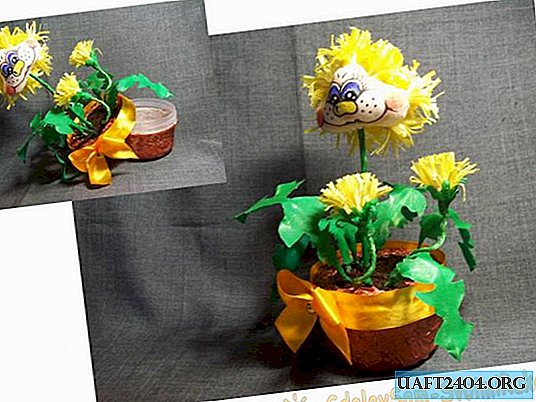
Our casket with a surprise is ready.

Good luck to all!
Share
Pin
Tweet
Send
Share
Send